ePrivacy and GPDR Cookie Consent management by TermsFeed Privacy Policy and Consent Generator

Quirky Patterns for Quirky People

BACK TO TUTORIALS The end of knotting tails! · CraftPixie
Copy Link

The end of knotting tails!

Craft Pixie - Saturday 20th of August 2022

The end of knotting tails!

Craft Pixie
Saturday 20th of August 2022

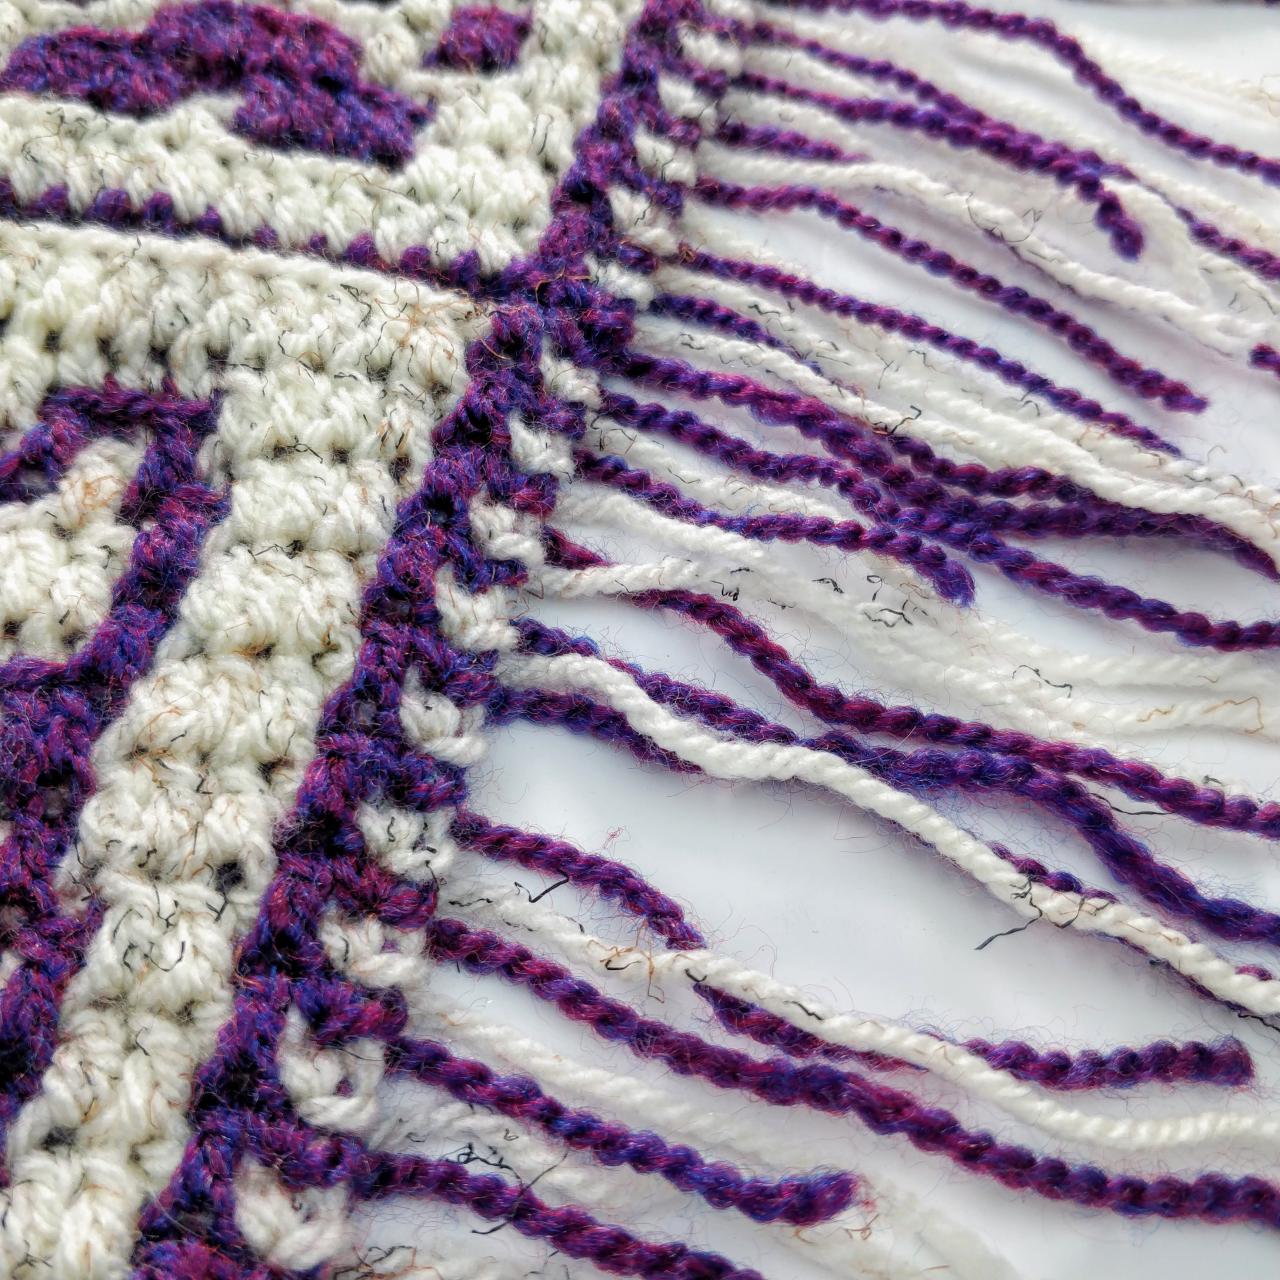
Knotting the side tails in pairs at the end of an overlay mosaic crochet project can be very tedious. However, I have a technique I use to avoid that. It still involves knotting, but this is done when the row is formed. It makes it less onerous and once the crochet is complete – it’s complete! Just a note: it can be difficult to unpick rows if you need to, but that’s a small price to pay for not having to spend ages knotting?!

Contents


Starting Border Stitch


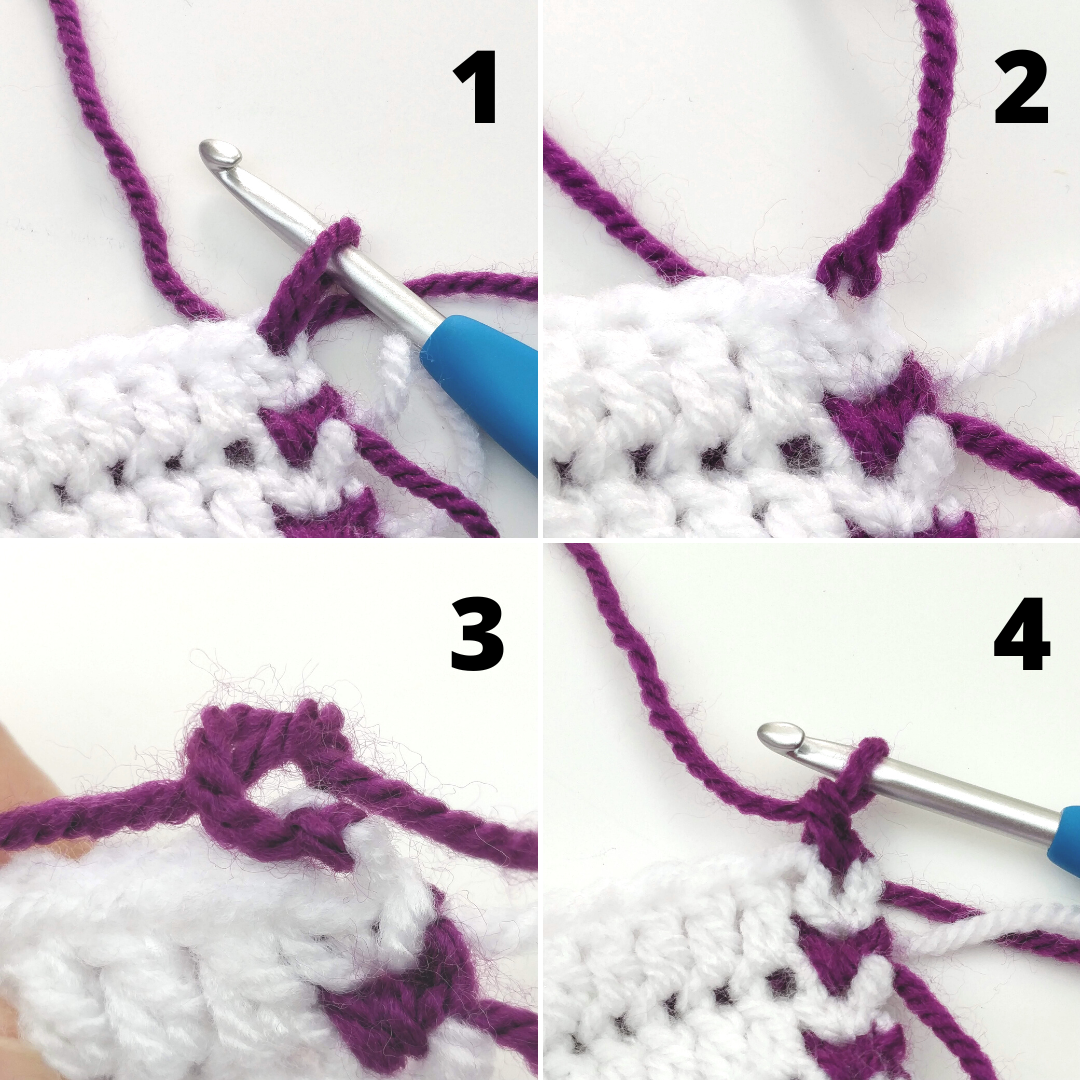
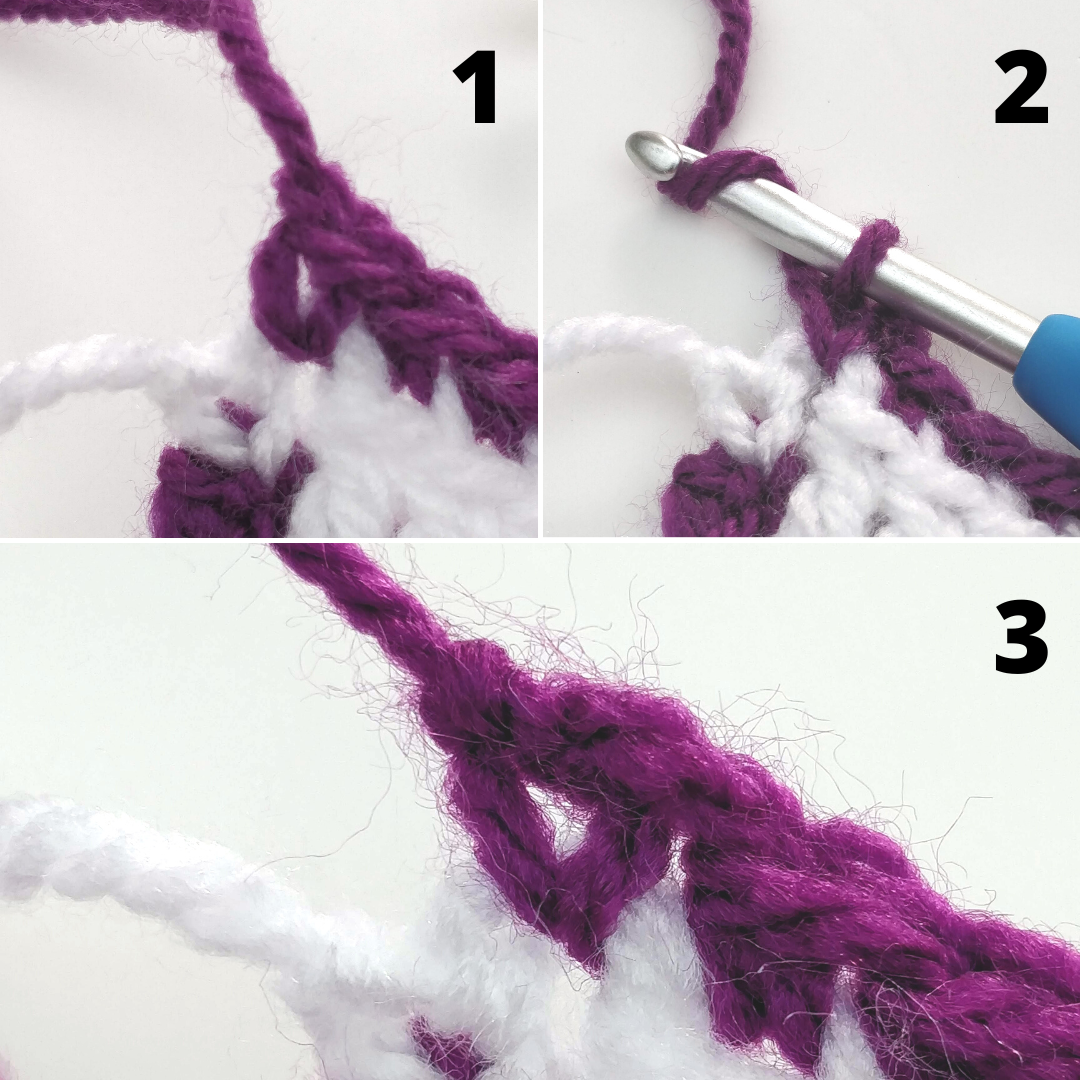
Before making the usual starting border stitch, do the following:

  1. Pull a loop of the new colour through the back loop of the previous border stitch then pass the short tail of yarn through.
  2. Pull up the knot gently. You are trying to keep the other colour from showing through.
  3. Using the short tail, make another over-hand knot and pull up gently. This will secure the tail.
  4. Now make the border stitch as usual: pull a loop through both loops of previous border stitch and slst; sc into both loops in the same place; continue with the pattern.

Back to Contents


Ending Border Stitch


  1. When you reach the end of a row, make a border stitch as usual: sc through both loops; cut yarn and slst pulling the yarn tail through.
  2. Make an additional knot by pushing hook through outer leg of previous border stitch.
  3. Pull a loop through and pass the tail through this loop pulling up gently.

Back to Contents

BACK TO TUTORIALS